Docked Window
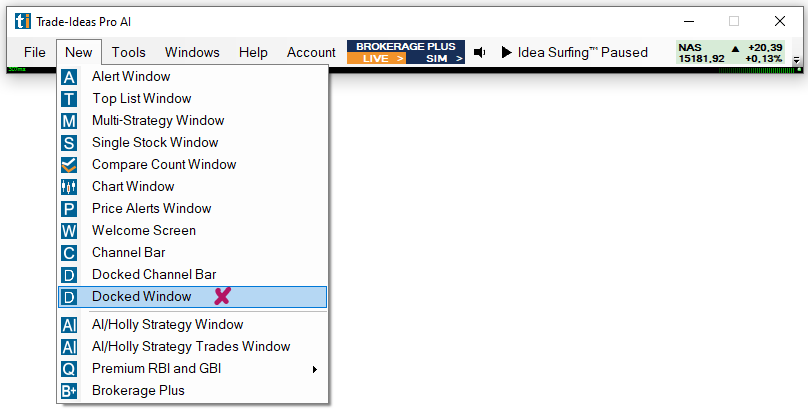
To open a blank Dock, go to the Toolbar, open the New Tab and select Docked Window. Give your new Dock a Name and press OK.
Thereafter, you can add any other windows to your Docked Window following the process outlined below:
If you would like all newly opened windows to automatically open in a Dock, go to the Toolbar, open the Tools Tab, select Options and then Layouts. Here, check the option Open in Dock window.
If you leave this option unchecked, you will still have the ability to manually create Docks.
Once the option Open in Dock window is enabled, every window you open from the New Tab of the Toolbar will automatically open in a Dock.
If a Dock has already been opened, all newly added windows will load into the same Dock.
The newly opened windows will initially be stacked as Tabs inside the Dock.
The layout of the Dock can be changed the following way:
Grab the left-hand side corner of a tabbed window with your mouse and drag it towards the center of the Dock.
This will bring up the placement tool. The placement tool provides 6 placement options. Top, bottom, left, right as well as tabbed on the top and tabbed to the left.
To place a layout item at the top, drag it towards the center of the Dock and let it go, once the top part above the placement tool turns blue.
Every window inside a Dock is a mini Dock all on its own and has its own placement tool.
-
To place a layout item at the bottom, drag it towards the center of the Dock and let it go, once the bottom part below the placement tool turns blue.
-
To place a layout item on the left-hand side, drag it towards the center of the Dock and let go, once the left-hand side of the placement tool turns blue.
-
To place a layout item on the right-hand side, drag it towards the center of the Dock and let it go, once the right-hand side of the placement tool turns blue.
-
To turn a layout item into a Top Tab, drag it towards the center of the Dock and let it go, once the entire area around the placement tool turns blue.
If a dock or mini dock contains many Top Tabs, they can be viewed and opened by clicking the small downward pointing arrow on the top right-hand side of the window.
To turn a layout item into a slide-out Pin, drag it towards the small separate placement tool on the left-hand side of the Dock and let go, once the area around the small separate placement tool on the left-hand side turns blue. To enable the auto-hide function, click on the small pin icon on the top right-hand side of the window. When auto-hide is enabled, these windows will only slide out, when clicked on.
You can resize the Dock, and mini docks inside the dock, any way you like. By grabbing their borders and dragging them.
To give a Dock a name, right-click into its header and select Change Title. Enter a new name in the Dock Window Title field, then press OK.