Custom Channel
If you have created your own layouts, you can access them by going to the Toolbar, opening the File Tab, and choosing Load from Cloud. In addition to that, you can access your default layout by going to the Toolbar, opening the File Tab, and selecting Load Layout.
Another way of accessing up to five custom layouts is to create Custom Channels in the Channel Bar or Docked Channel Bar.
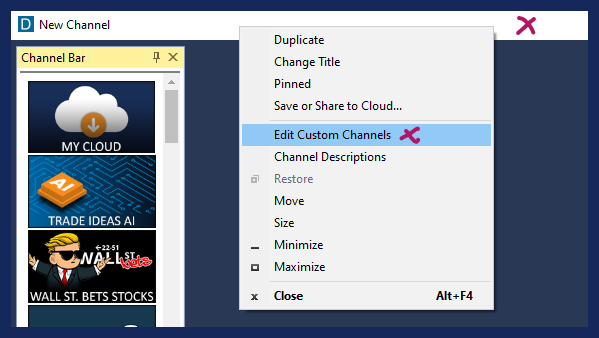
To do so in the Docked Channel Bar, right-click into the Docked Channel Bar Header and select Edit Custom Channels.
Click Add Channel on the bottom left-hand side to open the Custom Channel Editor. Select an image for your new Channel from the left-hand side or upload an image from your PC by selecting Upload Image File. The chosen image will appear in the field in the center. Use the dotted cropping rectangle to select the image area that will be visible in the Channel Bar. Once selected, click Crop Image below the Image field. On the right-hand side, you will be presented with a Preview of the new Channel Image. An active Channel shows the word On displayed in the center of the image. Enter a name for your new Custom Channel below the preview on the right-hand side.
Finally, click Select from Cloud to load your layout into the new Custom Channel. Use the Search field to find your layout or scroll through the list of layout items. Highlight the layout you would like to use for your Custom Channel, then press Select on the bottom left-hand side. This will add the Cloud Link to your layout to the new Custom Channel. Hit OK when you are done. Your new Channel will now be listed in the Custom Channel List. Hit Apply to add it to the Channel Bar or Add Channel to create another Custom Channel. You can add up to five custom channels.
Your custom channels will be displayed above the main Channels of the Channel Bar. If you click on it, it will load your own layout.
Please note, if your layout does not include a Docked Channel Bar, the Channel Bar will disappear once you click on your Custom Channel Image and open this Custom Channel without a Channel Bar.
To edit, remove or reorder your Custom Channels, right-click into the Docked Channel Bar Header and select Edit Custom Channels. This will open the Custom Channel List. To reorder your Custom Channels, highlight one, then use the up and down arrows at the bottom. To delete a Custom Channel, highlight it and select Delete Channel at the bottom. To edit a Custom Channel, highlight it and select Edit Channel at the bottom, which will open the Custom Channel Editor, where you can make your desired changes.
How to add a Custom Channel: