Create an Auto-Trading Strategy based on an Alert Window
Please read the previous section on how to create One-Click Order Entry Templates first!
Once you have created and successfully backtested an Alert Window, you can load it into our Brokerage Plus Module for automation. We heartily recommend testing any automated trading strategy in the simulator first.
Please note that trade automation is capped at 100 trades per day.
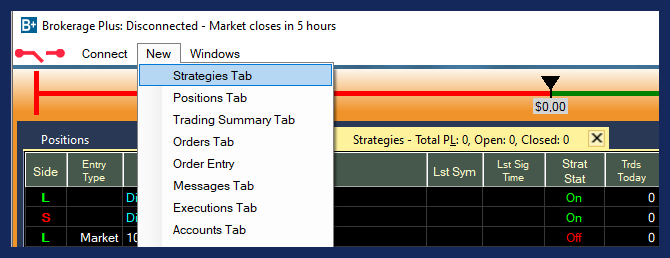
First, save your Alert Window to the cloud (right-click > Save or Share to Cloud). Then, open the Strategies Tab within Brokerage Plus by selecting New and then Strategies Tab.
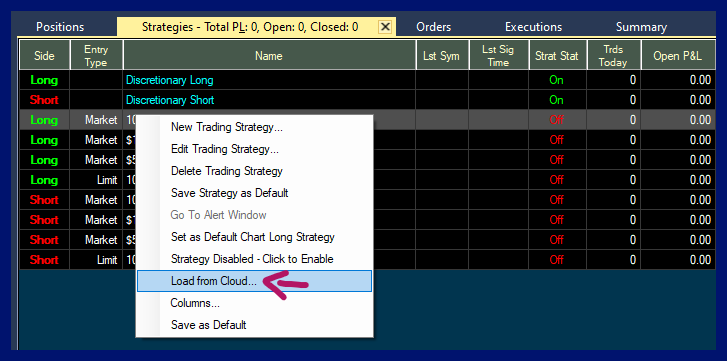
Right-click into the Strategies Tab Window and select Load from Cloud.
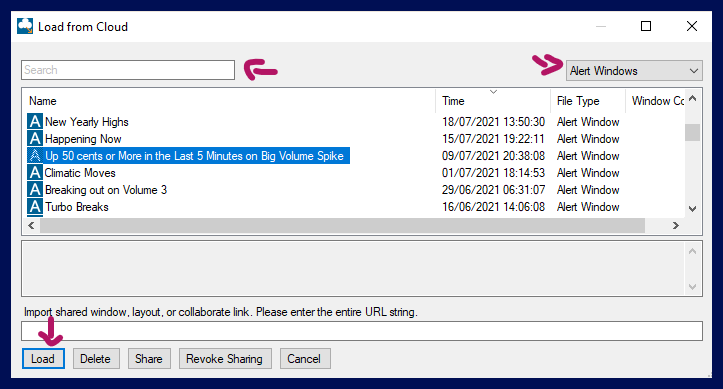
To find your saved Alert Window, enter its name in the search field, or scroll through the list. Then, highlight it and choose Load.
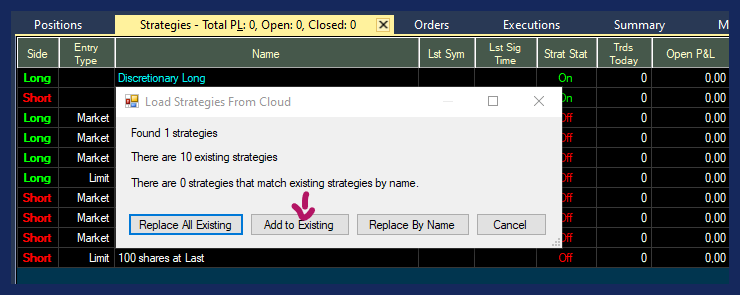
If you would like to add this Trading Strategy to an already existing list of strategies, select Add to Existing in the next window. To remove all other strategies, select Replace All Existing. To replace another strategy with this one, select Replace By Name. For this to work, you need to have an existing Trading Strategy that carries the exact same name.
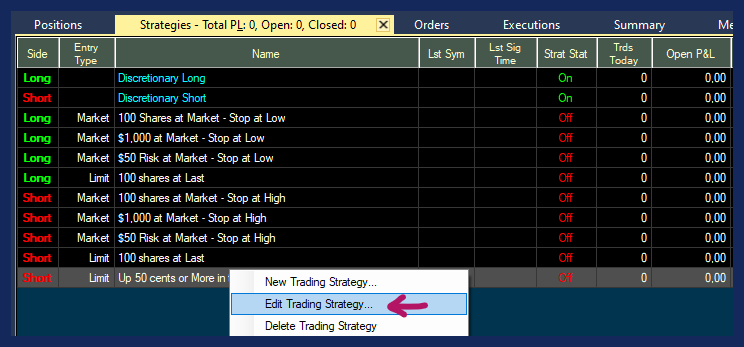
Once your Alert Window is listed in the Strategies Tab of Brokerage Plus, highlight it, then right-click and select Edit Trading Strategy. This will open the Trading Strategy Configuration Window where you can make adjustments.
Configuration Tab
Give your Trading Strategy a new Name if you like and choose its Direction. If you would like to buy stocks using the template, select Long, if you would like to borrow stocks to sell, choose Short.
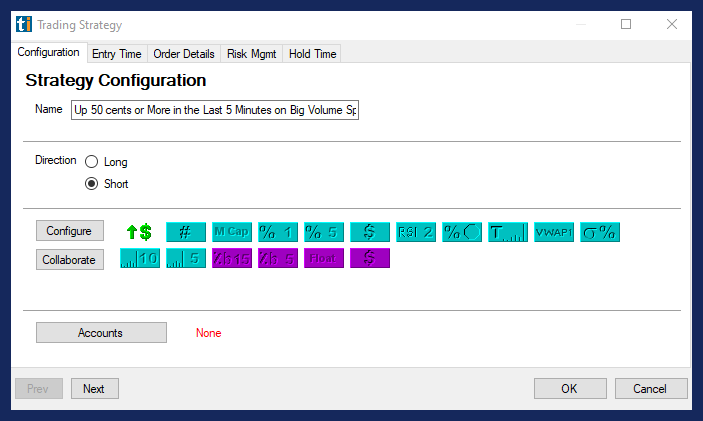
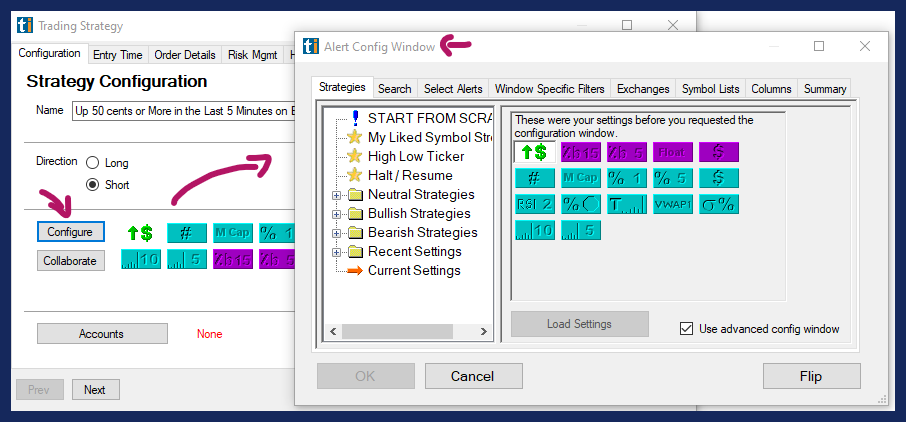
The field below displays icons of the alerts and filters that your Alert Window contains. To edit its setting, select Configure. This will open the Alert Config Window, where you can make your adjustments.
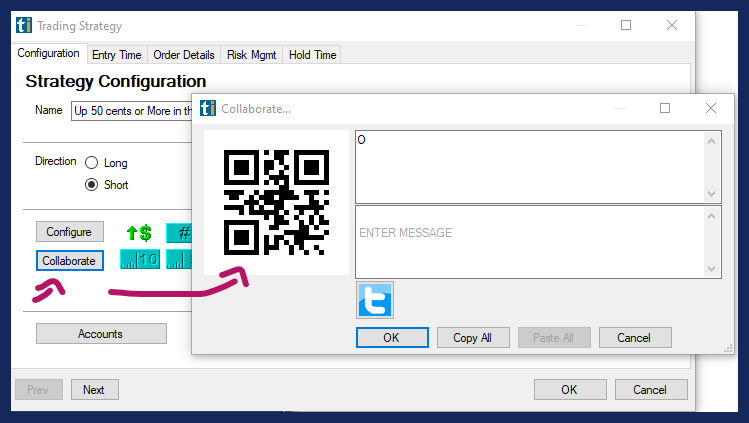
To replace the existing Alert Window with another one, use the Collaborate option. First, open the Alert Window you would like to use. Right-click into it, select Collaborate and then Copy All. Now you can use this Collaborate link in the Configuration Tab of your Trading Strategy. Simply press the Collaborate button, then paste the Collaboration Link into the field at the top and select OK. The icons will now display the alerts and filters of the newly added Alert Window. To make adjustments to its setting, press the Configure button.
Next, select Accounts and choose Accounts as Allocation Type. Then, select your trading account. This will either be our in-house simulator or your account at a participating brokerage. Please note, that you will have to connect to this account via the Connect Tab first for it to be displayed and ready to use.
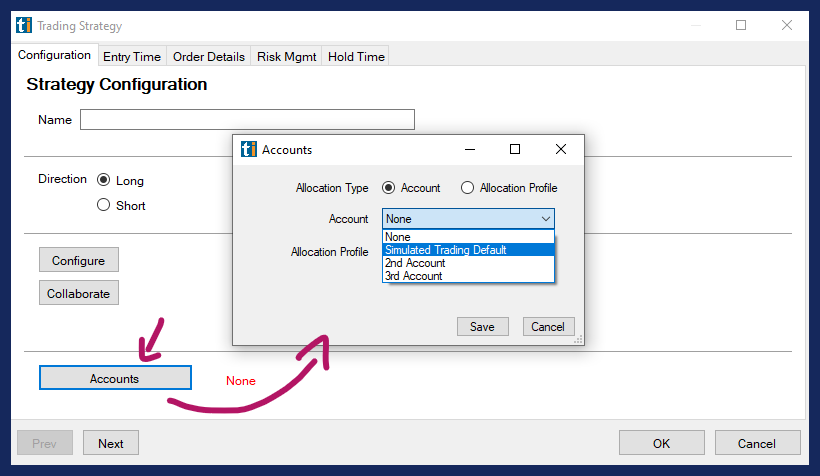
After choosing your account, hit Save.
The next steps follow the same process as outlined in B+ Basics. Some of the settings will automatically be imported from your backtest, but you can adjust them as you please.
Select OK once you have adjusted all your settings.
Enable Automation
To automate your Trading Strategy you will have to enable it every morning.
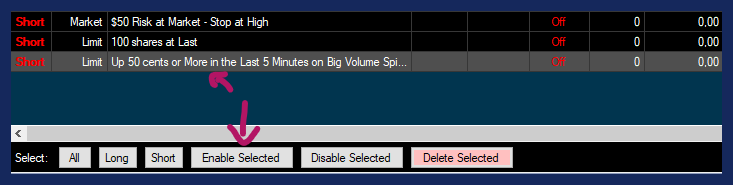
Highlight the strategy or strategies that you would like to enable for auto-trading then right-click and press the Enable Selected button at the bottom.
Please note, as a precaution, your Trading Strategies have to be newly enabled for automation every day, they will not stay enabled for longer than the current trading day and will also disable when the program is closed during the day.
Once executed, every trade will be displayed in the Positions Tab of Brokerage Plus
Any automation should always start with a test phase in a simulator. Our Brokerage Plus Module allows you to connect to our Trade Ideas Simulator, a participating Broker's Simulator, or a Live Account.